The Leader of the Pack - Our Heidern Guide for King of Fighters XIV
By Jeff Kotuby ·
The Commander of the Ikari Warriors is back for blood. Heidern returns in King of Fighters XIV, ready to move past his blood feud with Rugal Bernstein. We examine the silent killer's moves, combos, and role in a given team.
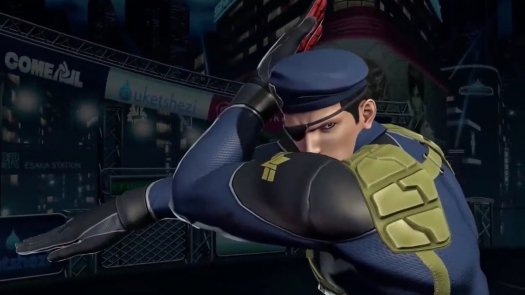
Heidern’s had it rough, to say the least. He lost his eye, wife, and daughter to one person, and he never even got to exact revenge on them! For the first time since King of Fighters 2002: Ultimate Match, Heidern is back to lead the Ikari Warriors to complete their latest mission. A man who taught himself a unique, but brutal brand of martial arts, Heidern’s abilities are not to be taken lightly. We’ll examine the very best of his moves, some practical sample combos, and where Heidern fits best on your team.
Please note: We’ll be using KoF notation for this guide. If you’re unfamiliar, it's easy:
A =Light Punch
B= Light Kick
C= Heavy Punch
D = Heavy Kick
MAX Cancel = B+C
QCF = Quarter Circle Forward, achieved by moving your directional stick down, down+forward, forward
QCB = Quarter Circle Back, achieved by moving your directional stick down, down+back, back
HCF = Half Circle Forward, achieved by moving your directional stick back, down+back, down, down+forward, forward
HCB = Half Circle Back, achieved by moving your directional stick forward, down+forward, down, down+back, back
Key Moves
Heidern, like every other character in fighting game history, has some key moves that should be utilized in order to be successful in matches.
Crouching A/B


Heidern’s Crouching A & B are both excellent moves to hit confirm with. They come out fast, and will allow you to effectively MAX Cancel to get some big damage.
Close Standing D

Heidern’s Close Standing D is the move you’ll generally confirm with after you pop MAX. It does good damage on its own but will help you really get the most from Heidern.
Stormbringer - Half Circle Forward + A/C


Stormbringer is a command grab, which can help set up Heidern’s mixup game if used properly. This move causes a hard knockdown, meaning your opponent cannot quickstand upon being hit with it. This can give you an opportunity to utilize some of Heidern’s other moves to mixup your opponent.
Heidern End - Double Quarter Circle Back + A/C
This is one of the moves we discussed above that you can use to apply pressure to your opponent. Here, Heidern summons buzzsaw made of energy that appears a varying distance in front of him depending on the strength of attack you used. You can even use both punches and control how far towards or away from you the move goes to punish or mixup, as shown by MadKOF here:
Gae Bolg - Double Quarter Circle Forward + A+C
Heidern’s Climax is very fast, does a ton of damage even in combos, and is able to punish moves from full screen. Obviously using a Climax requires meter, so you probably won’t be using it much if you’re using Heidern on point or mid.
Practical Combos:
We won’t get into the crazy MAX cancels too much here, but we will show you some easy combos that you can use to get started. Challenge yourself to improve upon these combos to fit your playstyle and the situation you find yourself in.
Jumping D → Cr. B → Cr. A → Charge down + up + C
This is a meterless jump-in combo that you can perform in any part of the screen. Simple, free, and puts your opponent closer to the corner.
Jumping D → Standing D → MAX Cancel → Standing D → DP + A+C → QCF, QCF+ A+C
Here’s our first MAX combo, and to be honest it’s not that hard. Just stay calm and work on the timing - you have more time to hit the second Standing D than you might think. You can end this with Heidern End (QCB + HCF + B/D) as well, but we opt for the damage that comes with using the Climax.
Jumping D → Standing D → MAX Cancel → Standing C → HCB + A+C
A decent damage MAX combo that uses 0 additional meter. You’ll also have a mixup opportunity after the hard knockdown from the command throw here.
Jumping D → Crouching B → Crouching A→ MAX Cancel → Standing D → Forward +B → DP+A+C→ Charge Back+Foward C→ DQCB + A+C
Heidern f.B gives hardknockdown on juggle, pretty good for upclose mixups #kofxiv #kofxiv3 #kof14 pic.twitter.com/PUKb21NeKW
— diz @ KOF98UMFE is a splendid game (@diz0603) April 12, 2018
This combo comes courtesy of @Diz0603 on Twitter. It looks scary, but you got this, just take your time and know that you don’t need as much time to charge back as you’re used to from other fighters, and you need to immediately be doing the QCB motion when you hit forward to let the Cross Cutter go. Practice makes perfect, so keep at it until you’ve got it!
Heidern’s Role
As a captain/commander/whatever rank he is, Heidern should probably be the last person to fight. Not just because of his status, but because he does best with lots of resources. That being said, he can be effective in any role, since he’s a strong character, so if you enjoy using him in a different position, do it!
Remember, it takes practice to hit some of these more difficult combos, so make sure you’re getting the appropriate training mode work in. Not sure how to use training mode to its maximum effectiveness? Check out our quick guide on getting the very most out of your lab work!