Destiny 2: Forsaken Campaign Guide
By Zac Cameron ·
How to take on the missions and take down the bosses in the Destiny 2: Forsaken campaign.
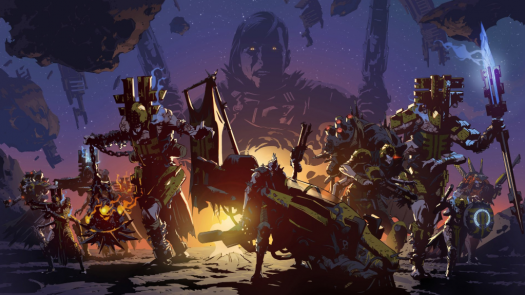
Forsaken, the latest expansion for Destiny 2, has finally arrived and players are gearing themselves to take on the newest challenges the game has to offer. The campaign for Forsaken will take us to The Reef, a new location for some, similar for others, where they’ll need to take on the terrifying Barons and their much-maligned master, Uldren Sov, in a quest for vengeance for our fallen Hunter Vanguard, Cayde-6. Some parts of he campaign aren’t exactly straightforward, so here’s a handy guide to get you through the story and avenge your fallen friend.
Destiny 2: Forsaken Campaign Walkthrough
The campaign for Destiny 2: Forsaken is somewhere between 6 and 12 hours long, depending on how well prepared you are heading in, and how much time you need to spend gaining stronger gear. The end game content for the campaign pits you against Power 460 enemies, so you’ll probably need to spend some time taking on Heroic Public Events on The Tangled Shore to gain strength in preparation. Let’s dive into the missions for Destiny 2: Forsaken.
Last Call – Power 330
Fight alongside Cayde-6 to help Petra Venj regain control of the dangerous Prison of Elders.
The first campaign mission if Last Call, and has your Guardian heading to The Reef with Cayde-6 to answer a call to arms from Petra Venj. Returning players from Destiny 1 will recognize Petra from the House of Wolves expansion, and now she’s in need of assistance to quell a riot in the Prison of Elders. This mission is very straightforward, with no real opportunity to head off-track and explore. Follow the directions of Cayde-6 and Petra as you move through the prison until you reach the main security control room. Here’s where it might get a bit tricky, Cayde-6 needs you to clear Hive Growth from the security systems, so look to the modules rising from the ground and destroy the strange rocky growths on them.

After you clear the debris, keep moving through the prison until you reach the mid-mission cutscene. Once that is over, head downstairs and take down the Abomination that awaits you, then steel yourselves for what comes next. Once the final cutscene plays out, head to the Tower and speak to Zavala and Ikora about what comes next.
High Plains Blues – Power 340
Search the Tangled Shore for Cayde’s killers.
The second mission for Destiny 2: Forsaken, throws you right into the action of The Tangled Shore, the new exploration zone for the game. Explore the starting area and take down any enemies you find until Ghost picks up a path to follow. Continue down that path to head to the next area, where you’ll regain contact with Petra Venj and meet some new and unexpected allies.

Once you’ve cleared away the enemies, you’ll meet a new face, the Spider, who’ll be your primary point of contact for The Reef. Spider will help you avenge Cayde-6 and give you the information you need, but only after you help him first and complete 5 bounties. The bounties are easy to acquire and complete and can be found by talking to Spider and selecting them from the bottom row, not the top section with Wanted Bounties. Once you knock out these bounties, speak again to Spider to find out what he knows about the Barons and Uldren Sov. Speak again with Petra Venj and Spider once more to learn that Petra will track down Uldren while you take down his cronies.
Scorned – Power 360
Follow Spider’s tips to the Scorned Barons’ hideout and avenge Cayde-6.
This mission is the introduction to the Barons that players will be hunting down in their quest for vengeance. Each Baron will have a corresponding mission marker on the map, with an indicated power level to give you an idea of how difficult the fight will be.

Target: The Rider – Power 390
Target: The Trickster – Power 400
Target: The Mad Bomber – Power 410
Target: The Hangman – Power 420
Target: The Mindbender – Power 430
Target: The Rifleman – Power 440
Each Baron will require a little bit of tracking, followed by a boss fight against the Baron you’re hunting down. Once you’ve eliminated the Barons, head back to Spider and Petra to get an update on the final two Barons and Uldren Sov.
The Machinist – Power 450
Battle across the toxic wastelands to take down the Scorned Baron known as the Machinist.
The fourth mission for Destiny 2: Forsaken pits you against the Machinist, a powerful foe and chief lieutenant of The Fanatic. Follow the waypoints to the toxic waste area where you previously fought The Rider and get ready for some unexpected help. There’s a derelict tank here that you need to repair, fetching a gun turret and navigation system. Once you’ve repaired the turret, your ghost will jump in to take control and grant you some fire support, allowing the two of you to fight together for the first time. Once the tank is fully repaired, blast open the doors to the arena and head off to battle.

Taking on The Machinist can be a bit tricky for low-power players, with a lot of high damage AOE attacks that prevent you from camping any single location. Keep moving through the arena whilst dealing damage to her and clearing away the minor enemies and be sure to avoid the toxic orange sludge that will damage you if you touch it. Once the Machinist is dead, head back to Petra to see what she could find and speak to Spider to learn about the mysterious Watchtower that dominates the skyline.
Nothing Left to Say – Power 460
Climb the Watchtower to stop Uldren and the Fanatic.
The final mission in the Destiny 2: Forsaken campaign is a long one and can prove quite difficult at times. This mission will take players to the Watchtower to eliminate the final Baron, The Fanatic, Uldren Sov, and something much more sinister hiding away.

Reaching the Watchtower, players will need to square up against The Fanatic in two locations, outside in a courtyard and inside in the reception area. The courtyard fight is medium sized, as far as boss rooms go, with plenty of cover to hide behind as you wear down The Fanatic. Once you take him low enough, he moves inside to a much smaller room that makes his large AOE attacks much harder to avoid. Keep wearing him down until he falls, then get ready to face off against his master and the main villain of this piece, Uldren Sov.
Chimera, Voice of Riven

Surprise, Uldren Sov was tricked, and his long journey was all to bring the Chimera, Voice of Riven, into our world. This fight will be very difficult for under leveled players, so if you’re seeing skulls next to their health bars, it’s time to leave and get stronger before returning.
There are three stages to this fight, corresponding to the three sections of the health bar. Once you remove a section of the health bar, you’ll be teleported to an Ascendant Plane to take on an Ascendant Plane Guard. Once the Guards are dead, a portal will appear to let you back into the fight against the Chimera. A key tip in the fight is to avoid standing in the black goop that dominates the arena, it will deal continuous damage while you touch it. As the fight progresses, the Chimera will summon orbs around the arena that tether it, rendering it invulnerable until they are destroyed. They should be easy to track given the solid beams they emit, so make sure you hunt them down in order to keep attacking.

A good tip going into this fight is to keep your distance from the Chimera. Hang towards the back of the room and use the pillars for cover. Long range Supers and Power weapons will do wonders here, taking down the boss before you witness the end of your journey of justice.
Return to the Tower to speak with Zavala and Ikora, then head back to the Tangled Shore to speak to Petra Venj and receive a Broken Awoken Talisman. Speak to Spider to learn more about this item and kick off the next quest, Key of Light and Darkness. With Cayde-6 now avenged, you’re free to continue your journey as you track down the escaping prisoners from The Prison of Elders and prepare for the upcoming raid, the Last Wish.