Destiny 2 Forsaken Guide - How to Get Thunderlord
By Jeff Kotuby ·
One of the more popular Destiny 1 Exotics, Thunderlord, is back in Destiny 2 Forsaken! Here's how to get your hands on the only Machine Gun in the game!
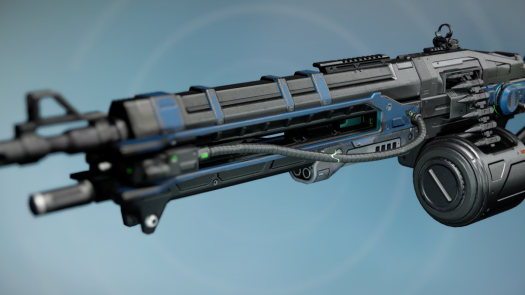
For those wondering how to get their hands on Thunderlord in Destiny 2 Forsaken, you're in luck! The Exotic Machine Gun has finally been confirmed as the quest reward for the Amanda Holliday/ Master Ives murder mystery quest! Be quick though, Guardians: You only have until November 27 to complete this quest and get this one-of-a-kind weapon. Here's how to acquire Thunderlord:
Step 1: Get the Quest from Holliday
If you haven't already, visit Amanda Holliday in the Tower to receive the initial quest, solving the mystery surrounding Master Ives' death. Master Ives was the Cryptarch in The Reef in the original Destiny game.
Step 2: Collect Journal Pages
Guardians can receive journal pages from either looting Legendary engrams or from killing Fallen yellow bars in the EDZ. You'll need 10 of them to progress to the next step.
Step 3: Loot EDZ Lost Sectors
Next, you'll have to loot three of the Trostland's Lost Sectors: Atrium, Terminus East, and Widow's Walk. The map below will reveal the locations of the three Lost Sectors. These are three of the more fairly obviously placed Lost Sectors in the game, so you should have no trouble finding them, just look for the symbols and follow the paths down.

You'll then have to travel to the Whispered Falls Lost Sector - you're headed to the top-left corner of the Outskirts area. The best place to spawn is at the Winding Cove Fast Travel point. Head east from your spawn point, then locate the mossy rock with the Lost Sector emblem on it. Head around behind the rock, then head down into the cavern below. Be careful not to fall too fast as the fall damage may kill you. Once you loot the Lost Sector, head back to Holliday in the Tower.
Step 4: Back to the Cosmodrome
Holliday will bring you back to the Cosmodrome, where your journey started all those years ago. Take the very same Winding Cove spawn point as you dead earlier, then head up to the quest marker on your screen, and go back through the Whispered Falls Lost Sector until you reach the Fallen Teleporter. Activate it to be whisked away to the Cosmodrome, the original Earth spawnpoint in Destiny 1. Navigate your way to the car graveyard and into The Breach. Clear the waves of Fallen enemies, culminating with a battle against Ives' killer, a Fallen Elite Captain. Once you get vengeance for your fallen comrade, head back out of the quest area, take your "last look" at the Cosmodrome, then head back towards the teleporter, where the quest will complete. Head back to Holliday, where you'll receive Ives' Last Engram. Bring the engram to Rahool to get your Thunderlord.
Thunderlord

Thunderlord returns as the only Machine Gun in Destiny 2 and a number of interesting perks. Its Exotic perk, Reign Havoc, summons lightning strikes from above to smite enemies of the Darkness. It also comes with the aptly named Lightning Rounds, which fires the weapon faster and more accurately the longer the trigger is held. Continuous damage will summon even more lightning strikes. It will also come with Feeding Frenzy, which increases reload speed after kills. These perks make this gun an absolute monster in PVE or PVP and well worth the grind.
While you're at it, why not add the Exotic Hand Cannon Malfeasance to your arsenal? Check out exactly how to get your hands on this bad mother lovin' Hand Cannon by clicking here.