Daddy's Home! A Practical Guide to Bardock in Dragon Ball FighterZ
By Jeff Kotuby ·
The wait is over! Bardock, the father of Goku, has finally made his appearance in Dragon Ball FighterZ. Learn the proud Saiyan's best moves, practical combos, and how he fits into your team!
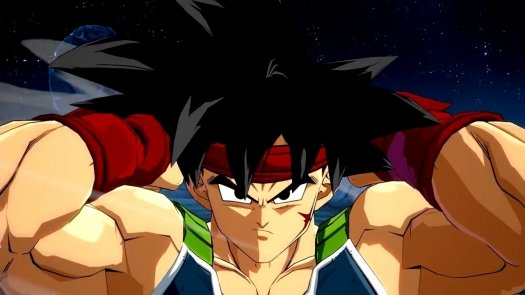
At long last, the first set of DLC characters for Dragon Ball FighterZ is available for download! Here, we’ll be breaking down Bardock, the proud Saiyan warrior (and Goku’s dad) as he appears in-game. Between him and his legendary counterpart, Broly, Bardock is by far the easier of the two characters to use, and is great for new and experienced players to fit on their team almost immediately.
As a heads up, we’ll be using anime notation for the moves found in this guide. If you’re not familiar with the notation, you’ll find a quick little description below. Luckily, DBFZ only has quarter circle motions, so don’t worry too much about the other inputs unless you’d like to try out games like Guilty Gear and BlazBlue.

Please also be advised of the notation we’ll use for attack strengths - L for Lights, M for Mediums, H for Heavies, and S for Ki.
Some Key Moves
There aren’t many different moves for the various characters in DBFZ, but everyone still has their best, and Bardock is no different. Here are some moves you’ll definitely want to keep in mind as you play him:
Air 5H:

Bardock’s Air 5H is a traditional Saiyan double axe handle (for lack of a better term.) Like Goku and Vegeta’s, this move can be instant overheaded using the following movement input:
2→ 9→ 6→ H
5M:

Bardock’s 5M is a leaping kick that travels a good distance across the screen. You can use it to convert on Vanish combos, allowing you to pick up some more damage.
Air 2H:

Like his Saiyan slam, Bardock has the trademark Saiyan Air 2H, an upward-propelling kick that will allow you to continue combos like you do with Goku and his Blue counterpart.
Raging Meteor - 214+L/M/H
Bardock’s “Spinning Mixer” attack is a nice way to apply some pressure to crouching opponents, as the last hit hits high. It can also be used while airborne as a way to extend combos further.
Saiyan Spirit - 236+H+S
Dragon Ball Z: Dokkan Battle veterans might be looking for the Great Ape follow-up here, but this is still one awesome super. Saiyan Spirit is fully invincible, making it one of the best reversal options in the game. It can also be used in the air to end combos.
Video courtesy of EventHubs
Practical (for once) Combos:
Yes, we’re sure you’ve seen tons of combos on Twitter and Reddit, but more often than not, those combos require tons of meter, assist support, and the use of Sparking to make work. The chances of you having all those resources in a real match are pretty slim, so rather than waste your time with long, complex combos, we’ll just give you some basic bread and butters that you can pull out when necessary.
Air 2H → L → L → 2M → 5M → Air L → Air M → Air 2H → Air L → Air M → Air 2H → L → L → S → 236+L → Super
This only looks scary, but this is the traditional Saiyan combo written out in notation. Check it out in action below.
See? Not that scary. You got this. Just take your time and break it up into parts if you need to practice more. You have the ability to end this with any Super you want, but be aware of the damage for each of Bardock’s three choices:
Ending with Riot Javelin (214+L+M): 4,366 Damage
Ending with Saiyan Spirit (214+H+S): 4,270 Damage
Ending with Revenge Assault (Level 3, 214+L+M or H+S): 5062 Damage
Of course the level 3 does the most damage, but in a case of any sort of follow-up from Bardock’s teammates, you’ll need to use whichever super allows you to do so. If you’re keeping Bardock in, opt for the Riot Javelin for the 94 extra damage.
You can also end with 241+H instead of 236+L. This will use an additional meter, but adds only about 35 more damage to the Saiyan Spirit ender, 50 more damage to the level 3 combo, but actually costs you damage when ending with Riot Javelin. If you need to burn the meter, do so, otherwise it might be wise to save it for later.
231+S → 5M → Air L → Air M → Air 2H → Air L → Air M → 214+H → Super
This is a conversion off of Bardock’s special S move, which sees him charge his fist up, punch his opponent in the gut, then fire off a ki blast into a wall bounce. You won’t want to randomly throw this move out due to it not having any super armor, so the best way to land this is to combo into the move with an assist, like Goku’s Kamehameha, after landing a few hits on your opponent. However, this is a nice way to convert in the corner if you manage to land it.
(Corner Only) L → 2M → M → Air L → Air S → Air 236 + M → Assist -- > 236+ S → Super
This is a corner combo that requires a beam assist like Goku or Goku Black, but it’s a way to utilize Bardock’s air 236 + M in a combo. You’ll also be able to use Bardock’s special ki move here to add a bit more damage. You can finish with any super move you’d like, but level 3 will do the most damage, of course.
These combos will set the foundation for your Bardock play, but don’t get pigeonholed into these combos only! Combine these basic combos with your team’s assists and try to personalize them to fit your team composition and play style.
The Captain Takes Point
Like his son, Bardock should function well in any position you put him in, but point seems to be the best place for him. He can do good damage with little meter, but also utilizes assists well. But just like Goku, he can be placed in any position and be successful. His assist is a version of his Rebellion Spear special, so it can be used like Yamcha’s to extend combos.
Bardock seems like a character that is able to be plugged into any team composition or role and be successful. New players and pros alike can expect Bardock to be a great addition to their team.